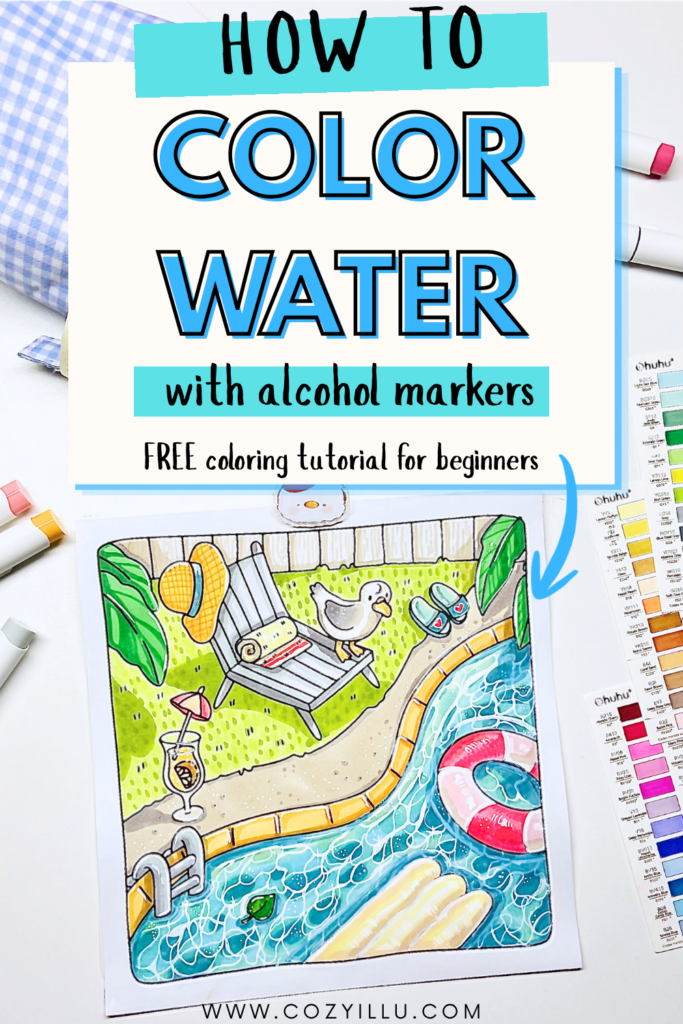
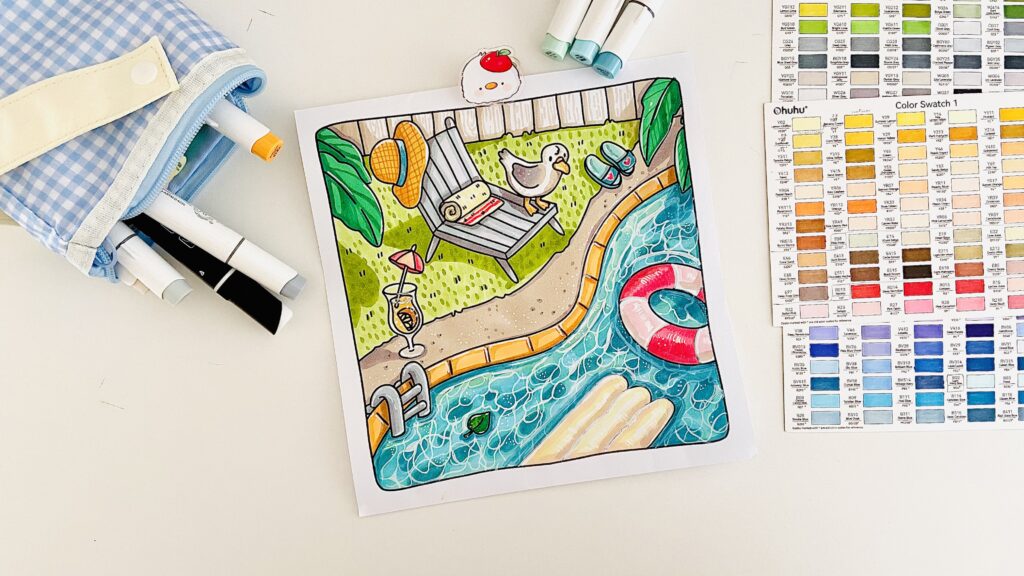
TL;DR: Learn how to color water with alcohol markers using an easy beginner method. Create depth, movement, and highlights with simple step-by-step techniques. Water can look difficult in a coloring book, but it gets much easier once you stop thinking of it as “blue” and start thinking of it as light, depth, and highlights. In simple terms, water looks believable when the edges feel lighter and more transparent, the center feels deeper, and the surface has broken shapes and white highlights to suggest movement.
Coloring water is easier when you break it into layers. Start with a light blue-green around the edges for transparency, add a medium blue-green toward the center for depth, then place irregular darker shapes across the water to create movement. Blend those shapes with your lighter colors and finish with a white acrylic or gel pen for highlights and sparkle. This is an easy, beginner-friendly way to color water with alcohol markers.
If you landed here searching for how to color water with alcohol markers, you are in the right place. This is a tutorial for beginners and it uses an easy method you can copy exactly on your first try.
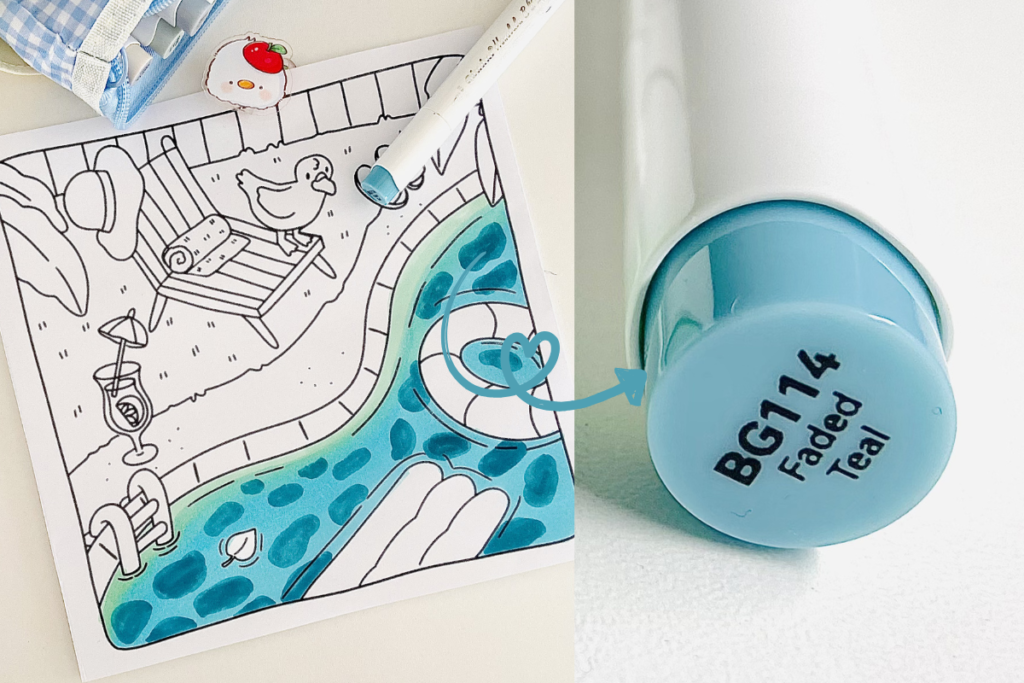
For this water effect, I used my favorite Ohuhu alcohol markers:
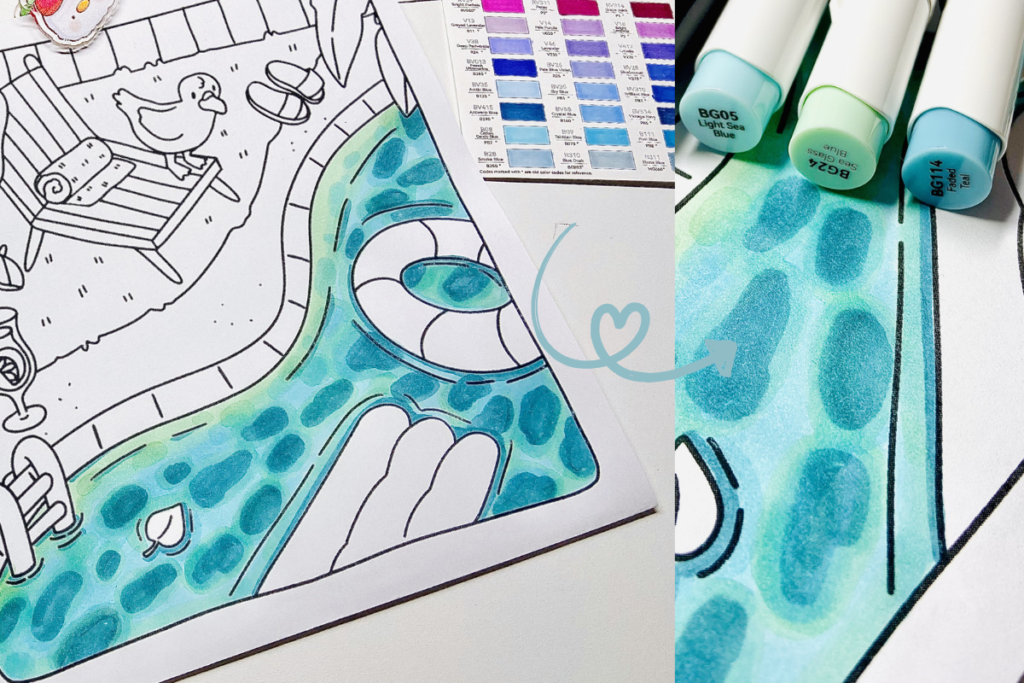
- BG24 for the light transparent edges
- BG05 for the mid-tone
- BG114 for the darker shapes
- Ohuhu Acrylic Marker 101 for the white highlights
This is not the only way to color water, but it is a simple and effective way to get a pretty result without overcomplicating it.
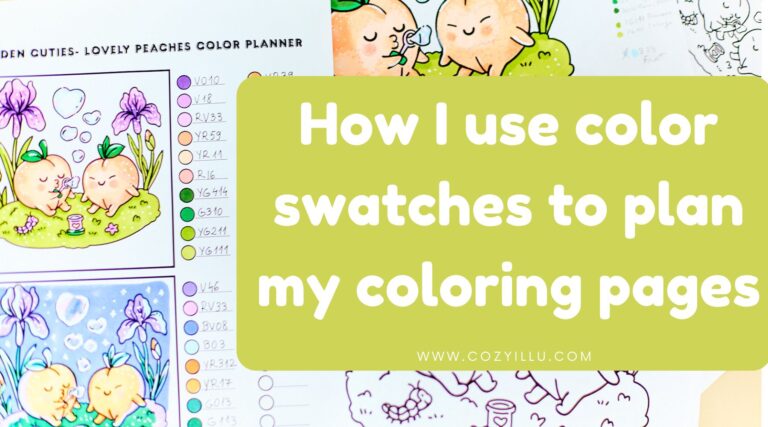
Pin this image to find this article later. 📌
Why this method works
Real water does not have one flat color. It changes based on depth, light, reflection, and movement. In coloring pages, you do not need to recreate every detail. You only need to show a few visual clues clearly:
- lighter edges for a transparency effect
- deeper tones toward the center to suggest depth
- uneven darker shapes to create movement on the water surface
- white highlights to show reflected light
That combination gives you a readable water effect fast, which is a great way to handle lakes, ponds, pools, or decorative water scenes in coloring books.
How to color water step by step (with alcohol markers)
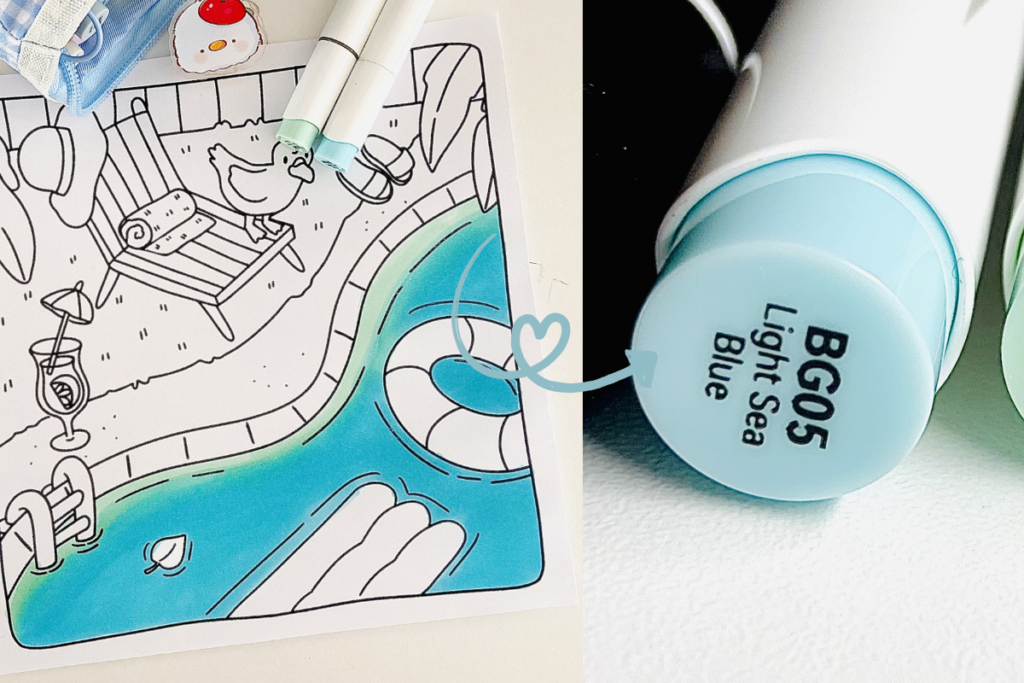
Step 1: Start with the lightest shade around the edges
Begin with BG24, a light greenish blue. Use it around the outer edges of the water area first.
This matters because the edges are where you can suggest a transparent look. A lighter shade keeps the water from looking heavy or flat right from the beginning. Work carefully around the shoreline, rocks, plants, boats, or any floating objects.
Do not worry about perfection. The goal in this first layer is simply to map out the water and keep it light where transparency would make sense.

Step 2: Move toward the center with a slightly darker blue-green
Next, use BG05 and color more of the center area.
You do not need a harsh line between BG24 and BG05. Let the two shades touch and overlap a little so you get a smooth transition. That soft shift is important because water usually looks better with blended color than with obvious color blocks.
At this stage, your water should already look more dimensional. The lighter edge and slightly darker center create the first sense of depth.
Step 3: Add distorted blobs with your darkest shade
Now take BG114 and make irregular “blob” shapes all through the water. Keep them uneven and varied. Some can be small, some medium, and a few a little larger.
These shapes should not look like perfect circles or repeated patterns. Distorted blobs work because they mimic broken reflections and movement on the water surface. This is the part that helps flat marker coloring start to look more like water.
Spread them out across the area, but do not pack them too tightly. Leave room for the other colors and the white highlights that come later.
Step 4: Blend the edges of those dark shapes
Once the darker shapes are in place, go back to BG05 and soften the outer edges of the BG114 blobs. After that, use BG24 again in some areas to soften things even more.
This step makes a big difference. It turns separate dark shapes into a more natural pattern and creates a better smooth transition between your values. If you skip this, the darker shapes can look pasted on instead of part of the water.
You are not trying to erase the BG114. You are just helping it settle into the water.
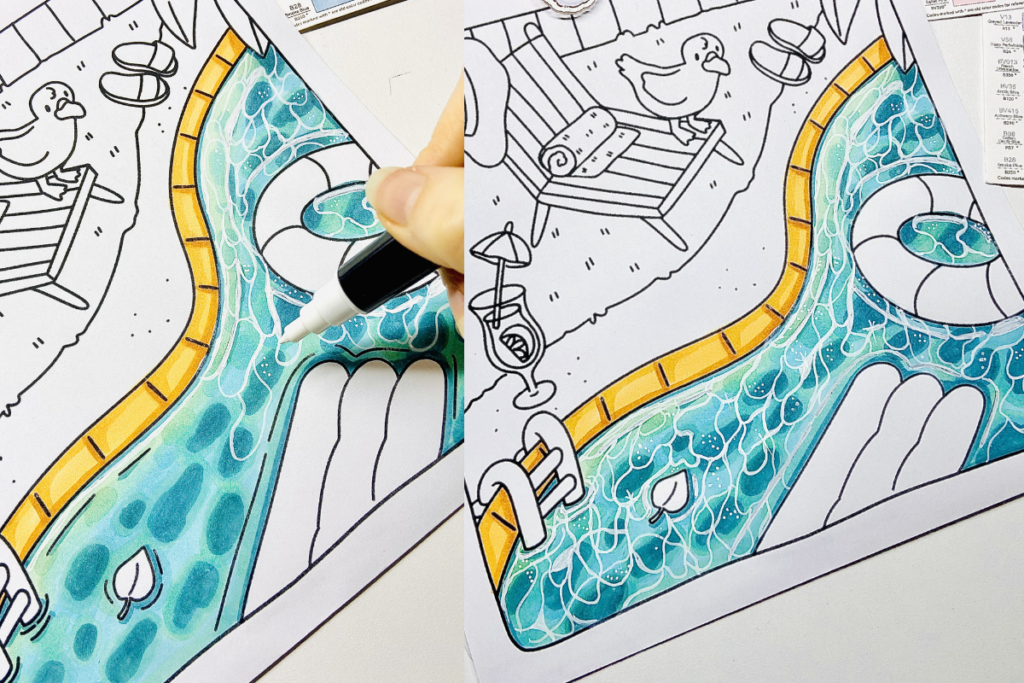
Step 5: Add white highlights for sparkle and movement
To finish the effect, use a white acrylic pen. If you do not have one, a white gel pen can also work, though acrylic often shows up more clearly over alcohol marker.
Make intertwining white lines around and over the darker blobs. Then add a few small dots here and there.
This is the step that gives the water its reflective finish. The white lines act like broken light on the surface, and the dots add sparkle. Keep the marks organic. Curved, uneven lines usually look better than stiff straight ones.
Do not cover every section with white dots. A few well-placed highlights are usually enough.
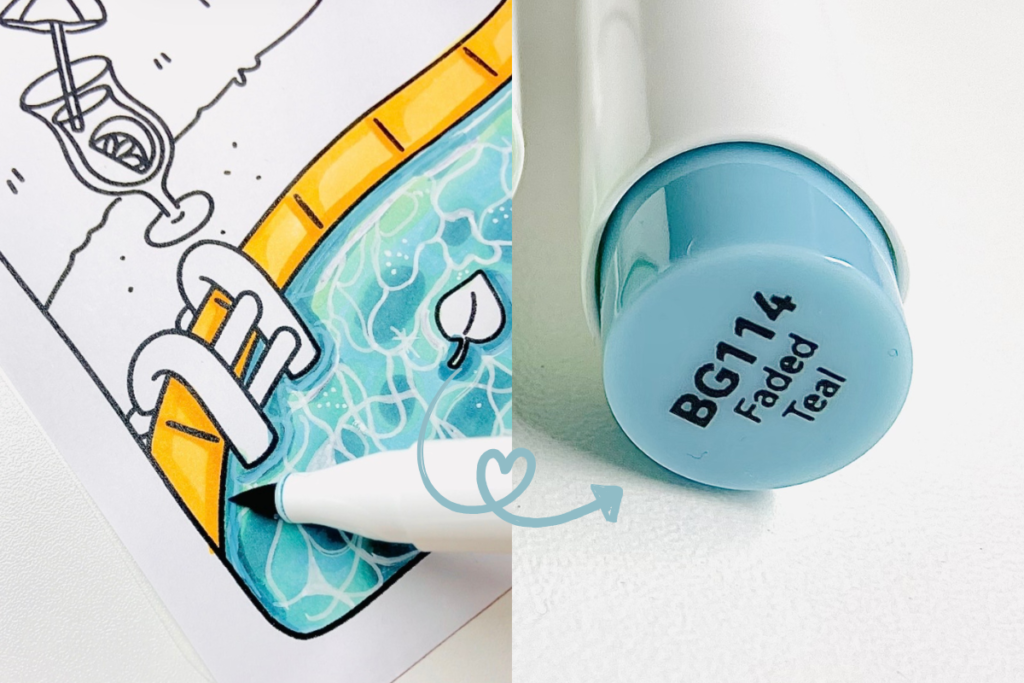
Step 6: Add optional shading over the highlights
If your water has floating objects, such as leaves, flowers, boats, or lily pads, you can add some extra shading on top of the finished effect.
Use BG114 lightly over parts of the white lines near those objects to suggest shadow. This small detail helps anchor objects into the scene instead of making them look like they are sitting on top of the page.
What beginners often get frustrated with
A lot of people get intimidated by water because they try to make it too realistic too soon. For coloring pages, simple choices usually look better.
One common mistake is using one flat blue over the entire section. Water needs variation in value or it can look like glass, plastic, or sky.
Another mistake is making every ripple or dark shape the same size. Repetition makes the pattern stiff. Water looks more natural when the shapes are uneven.
If you do not have these exact Ohuhu colors
You can still use this method with other brands. The exact codes are not the essential part. What matters is choosing:
- one light aqua or blue-green
- one medium blue-green
- one deeper blue-green
- one white pen
If your markers lean more blue than green, that is still fine. If your page has warmer lighting, you can even shift the palette slightly. The structure stays the same: light edge, medium middle, darker broken shapes, white highlights.
How to make the effect look even better
If you want to improve the finish, use a reference photo of calm water or lightly rippling water. You are not copying it exactly. You are just training your eye to notice how highlights break up, how darker areas collect, and how the color changes across the water surface.
It also helps to turn the page as you work. Sometimes the best way to draw flowing highlight lines is by rotating the page so your hand moves comfortably.
And start simple. A clean, effective water effect almost always looks better than one that is overworked.
A simple beginner recap
Here is the easiest way to remember how to color water:
- Light color on the edges
- Medium color toward the center
- Dark irregular blobs across the water
- Blend their edges back with the lighter shades
- Add white lines and dots for highlights
- Add extra dark shading near floating objects if needed
That is it. If water has felt intimidating before, copy this exact method first. After that, you can adjust the shapes, colors, and contrast to fit your own style.
Cozy Illu freebie and water effect coloring challenge
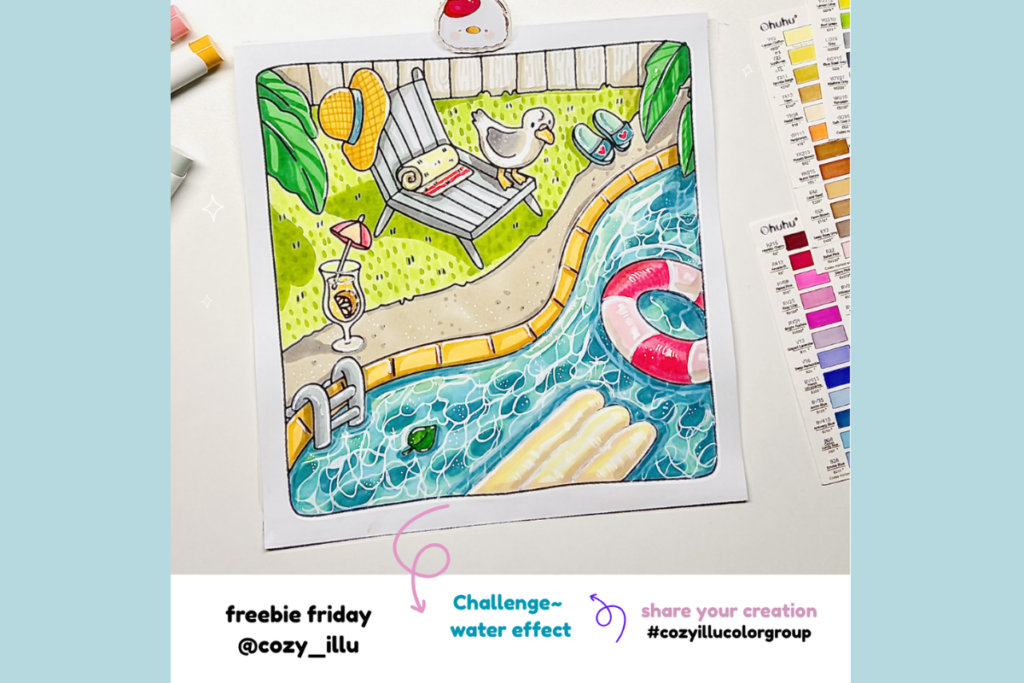
This tutorial was used on a Cozy Illu Freebie Friday coloring page. You can download the page below and join the water effect coloring challenge.
If you try it, tag @cozy_illu and use #cozyillucolorgroup on Instagram or TikTok. You can also share your page in the Facebook group if you want help with the tutorial from the Cozy Illu coloring community.
There is a new free coloring page and a new coloring challenge every Friday , so it is a fun way to practice coloring effects and build confidence with alcohol markers.
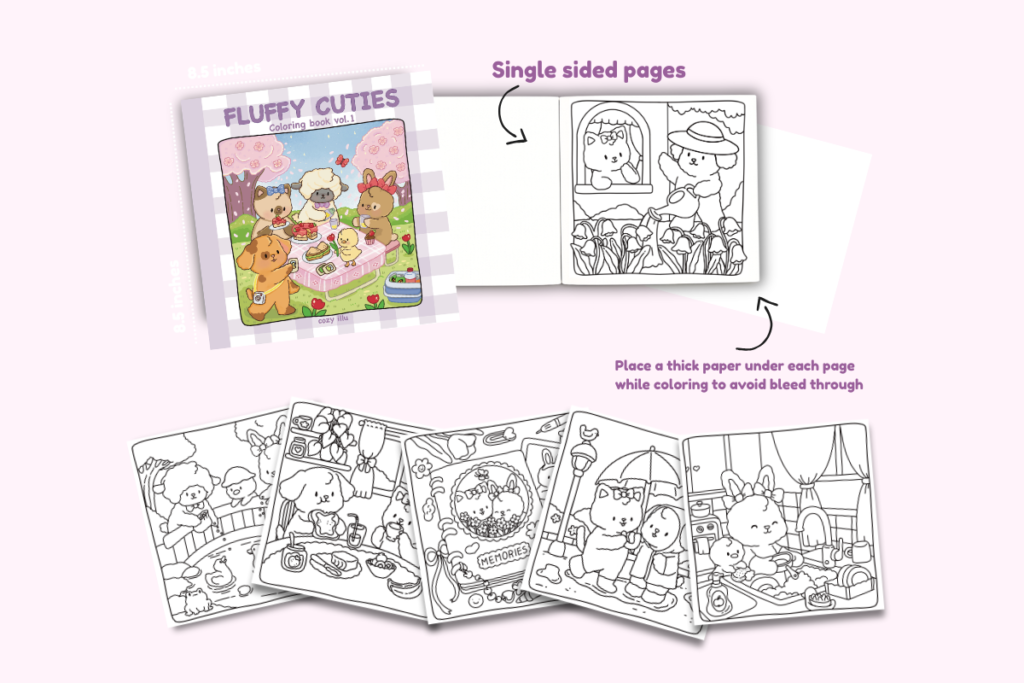
Get More Cozy Pages to Color: Fuffly Cuties Vol. 1
If you enjoyed this tutorial, you can keep coloring with my new book, Fuffly Cuties Vol. 1.
It is filled with cute, cozy illustrations that are fun to color and great for practicing simple techniques like water effects, shading, highlights, and soft marker blending. If you love relaxing pages with sweet details and a playful style, this book gives you plenty more to work on.
Fuffly Cuties Vol. 1 is available in two formats:
So if you like holding a printed book in your hands or prefer to print your pages at home, you can choose the version that works best for you.
You can grab your copy on Amazon or shop the digital PDF version in my store and start coloring right away.
Here are some reviews from Amazon:

Final thoughts
Water does not need to be perfect to look good. It just needs a clear pattern of light, mid-tone, dark, and highlight. That is why this method works so well for beginners.
If you are learning how to color water with alcohol markers, start with this easy process, keep your shapes loose, and trust the layers. A few thoughtful color choices can give you a soft, lively water effect without making the page feel complicated.
What color to color water?
Water usually looks best in layered shades of blue, blue-green, or aqua rather than one flat color. A light shade around the edges and deeper tones toward the center help create a more realistic water effect.
How to color water with alcohol markers?
Start with a light blue-green on the edges, add a medium tone toward the center, then place irregular darker shapes across the water. Blend the edges of those shapes and finish with a white acrylic pen or white gel pen for highlights.
How to color water with markers?
Use at least three shades: light, medium, and dark. Build the color gradually, keep the edges lighter for transparency, and add white highlights at the end to show reflection and movement.
How to color water with colored pencils?
Layer light blues and blue-greens first, then add darker shapes softly to suggest ripples and depth. Burnish lightly or blend in small circles, and use a white pencil or gel pen for highlights if needed.
How to color waterfall?
For a waterfall, keep more white space than you would for still water. Add light blue or blue-gray shading around the edges and underneath the flowing sections, then use white highlights to show fast-moving water and foam.
How to color water drawing?
Focus on value changes instead of outlines. Use lighter areas for reflected light, darker areas for depth, and broken shapes or curved highlights to suggest movement across the water surface.